ICEINSPACE

|
Coronado SolarMax II 60mm Scope - Part 2
Submitted: Friday, 17th February 2012 by John Wilkinson
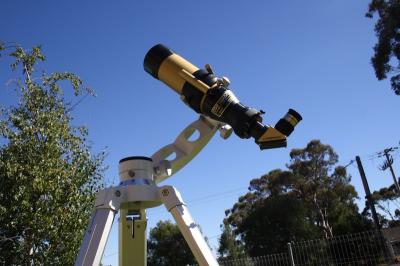
This is Part 2 of a review of the Coronado SolarMax II 60 mm H-alpha scope used exclusively to observe the Sun. It follows my first review on IceInSpace, posted 30-June-2011. You should therefore have read the first review before this one. I have had my SolarMax II scope for just over a year now and still enjoy using it each day to observe and photograph the Sun from Central Victoria, Australia. It is a single stack scope and actually has a 70 mm aperture. A second filter (Coronado Part number SME 60) can be screwed into the front of the scope to make a double stacked instrument or you can order it as a double stacked scope. However when you add the second stack the aperture is reduced back to 60 mm and the image is less bright. I don’t have a second filter but I have looked through a double stacked scope. The view is slightly better than a single stack scope but it is debatable whether it is worth the extra $1000. I can get excellent photographs from my single stack scope. The single stacked scope has a bandpass of < 0.7 A while the double stack is closer to 0.5 A (Angstrom). Generally the lower the bandpass the more surface detail you will see. MountingOne change I have made since my first review, is that I brought a better mount. I now use a GSO precision SkyView ALZ mount, which has slow motion controls. It is an excellent mount that is really well made. There is a review of here on IceInSpace, posted 10-May-2011 and a photo of mine below. The price is very reasonable (under $300). See Photo 1. You do not have to use a driven equatorial mount to take pictures of the Sun, as exposures are very short.
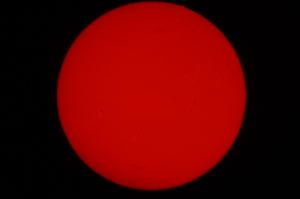
The helical focuser of the SolarMax II takes a bit of getting used to – it has a little bit of backlash and you have to rotate it sideways to achieve focus. The internal etalon once set requires little if any daily adjustment. I have experimented with different eyepieces and found the supplied Cemax eyepiece good but no better than others I have. Visually I prefer a 12 mm Cemax eyepiece – this provides a full disc view of the Sun and shows detail at higher magnification than with the supplied 25 mm Cemax. It does however scatter some of the red H-alpha light inside itself. To see detail you have to allow time for your eye to adjust to the red H-alpha light (approx. one minute). I have found some Meade wide angle eyepieces are just as good as the Cemax and they produce less scattered red light. It is worth trying different eyepieces to find which works best for your set up. When you take photographs through an eyepiece you want virtually no scattered red light around the Sun’s perimeter. You also want to use an eyepiece that will slot into the lens of your camera. Taking PhotographsTo get the most out of the SolarMax you really need to take photographs. I said in the first review that the SolarMax II 60 mm is much better photographically than visually. I can now take photos through my single stack scope that are as good as those I’ve seen through a double stack scope. However, taking photographs is not simply a case of holding a camera up to the eyepiece and taking a picture – all you will get is a bright red image of the Sun. See Picture 2 below.
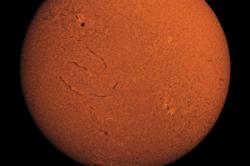
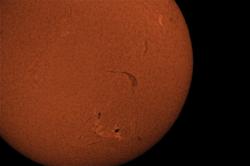
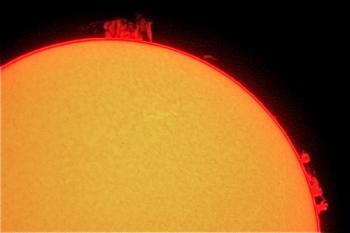
I use a Canon 1000D SLR camera mounted on the eyepiece and take single exposure photographs using manual settings. You have to do a fair bit of trial and error experimenting to perfect the pictures and you must use image processing software to reveal the surface detail. One of the most difficult jobs is to get the camera focus right – I have taken many pictures at different focus settings in order to find the correct focus (and it is not at infinity). I have placed a mark on my camera lens to show where the best focus is for my eyepiece. I have found 1/320 sec exposures at ISO 200 works best for taking pictures of the surface details (faculae, filaments, sunspots, granulation). For prominences, an exposure of 1/80 or 1/100 sec at ISO 400 is best. Prominences require a longer exposure than surface detail - as a result the surface is overexposed. For surface detail I take raw images and convert them to TIFF or maximum JPEG format for printing. For the prominences I prefer JPEG images as the colour comes out closer to what you see visually. Images on my computer (an iMAC) show much higher resolution than those printed on paper. Likewise when you post the images onto a website, you tend to lose some detail and resolution. Images are processed using photo image processing software that allows adjustment for contrast, levels, sharpness, exposure, definition and colour. A lot of experimenting is required – but that is half the fun. I can obtain a picture ready for printing within 5 minutes of taking it. Photo 3 shows an example of a raw image after processing. The surface detail comes out well. The images below are all taken with my single stacked scope with a single exposure. People using expensive CCD cameras and double stacked scopes usually take many frames and stack them on top of each other with image processing software to achieve their high contrast results. The quality of photographs also depends in part on atmospheric conditions. I always take at least six pictures then process the best. The advantage of taking digital SLR camera photos is that if you don’t like a particular shot or it was taken not precisely over the sweet spot of the telescope view, you can delete it straight away. Further information about solar astronomy can be seen in my latest book “New Eyes on the Sun” published by Springer 2012. Best order via online bookshops, such as Amazon, Book Depository or Fishpond. Details, including more solar images (pictures) can be seen on my website http://astroscimac.com.
Hopefully this review will encourage more amateur astronomers to observe and photograph the Sun. Observing the Sun on a daily basis is a rapidly growing hobby that provides terrific results once you get the hang of it. Good observing!
Review by John Wilkinson (John W). Discuss this review on the IceInSpace Forum,  |
|
||||||||||||||||||||||||||||||||