ICEINSPACE

|
Making a Low-Cost Illuminated Finder
Submitted: Wednesday, 29th June 2005 by Mike Salway
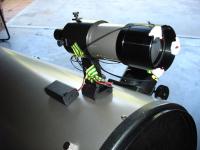
The finderscope, what a useful tool it is.. however on a dark night, with a dark sky, it can be almost impossible to see the dark crosshairs to be able to centre the object at the centre of the crosshairs! I found this to be a nuisance especially when imaging with the ToUcam. Because I don't have tracking, I rely on a well-adjusted and accurately pointing finderscope to slew the scope to the correct location to allow the planet to drift across the FOV (field-of-view) of the ToUcam so I can capture video of it. The ToUcam is such high magnification (roughly equivalent to a 4-6mm eyepiece) that I really need to know where the planet is in relation to the crosshairs. Because I couldn't see the black crosshairs properly, I ended up using my red light to shine across the front lens of the finderscope, so that the background was illuminated red, enabling me to see the black crosshairs and the bright planet. While this worked, it wasn't ideal, as it meant one hand was now busy holding the light etc. My solution then, was to create this little 3-globe illuminator to light up the lens of the finderscope by flicking a switch on and off as I needed.
The Parts Needed
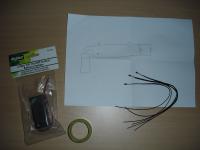
I headed out to Dick Smith to buy the goodies I needed, and found some extras at home, which include:
I didn't need any bright Red LED's, I just wanted something low power so I chose the globes which are also easier to install because there's no +ive/-ive wires to worry about. The battery pack takes 2 'AA' batteries. The Construction
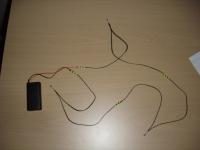
It's been 15 years since I did any electronics in school, so I got the guy from Dick Smith to draw me a diagram of how I should connect them up. He suggested 2 in series and 1 in parallel, and you can see the drawing in the diagram above. Doing it like this though, I found the first globe was really bright and the other 2 (in parallel) were really dim. So I simply hooked all 3 globes up in series, and now all 3 have a lowish brightness, perfect for what I wanted. Maybe someone who knows electronics can suggest what was wrong.. :) I stripped each of the wires back an extra 5-10mm using needlenose pliers to give me enough wire to wrap around each other, and taped them over using the electrical tape.
Attaching to the Finderscope
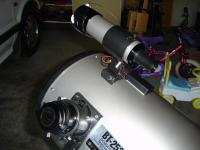
This part of the construction isn't my best work - it's a little messy with blue-tac and stripey electrical tape, but if you're worried about appearances you can get some black electrical tape and find an alternative to blue-tac to connect it to the finder. I used double-sided tape to stick the battery pack onto the OTA, and blue-tac to stick the globes on the front of the finder. I also just used the tape to tidy up the wires and keep them together.
First Light!Well, what can I say? It works! Simply turn it on or off on the battery pack as and when needed, and it gives a nice red background glow when looking through the finder, making the crosshairs easy to spot and allowing more precise alignment of the planets/stars to the centre of the crosshairs! For AU$5.00 in parts and 30 minutes of my time, it is a quick and easy solution to a frustrating problem I was having.  |
|
|||||||||||||||||||||||||||||||||||