ICEINSPACE

|
Build a Cheap, Simple Laptop Light Control Hutch
Submitted: Thursday, 4th January 2007 by Alan Sheehan B.E
Most of the time while I’m out by my myself imaging, I’m not too concerned about stray light from my laptop, but with IISAC2007 approaching I thought now might be a good time to build a light control hutch for the laptop. The other reason I want a light control hutch is to help me see the screen during the day for solar imaging, so there are a number of criteria I want my hutch to meet:
Materials Required
Tools Required
MethodI considered a number of alternatives before settling on this solution:
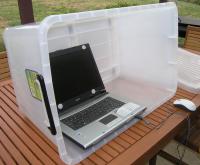
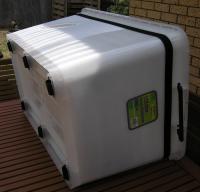
I ended up going with the 120 litre storage box (from Bunnings) because I was confident it was big enough. Having seen the laptop inside the 120 litre storage box now, I think the recycled plastic boxes from Bunnings would have probably been OK too, but I think the larger box will provide better ventilation for the laptop and it certainly has room to operate the mouse inside the box.
It is necessary to paint the storage box to make it opaque. Because I don’t want the box to get hot when out in the sun, it needs to be white to reflect the light and not absorb it and turn it into heat. I chose to paint the inside of the box so that the outside surface remains robust and impervious to scratches. To give the paint a reasonable chance at sticking, sand the inside surface of the box. I sanded the bottom, both ends and only one long side. The unsanded side will be left unpainted. Once the surface is sanded and clean of dust, mask off all the areas you don’t want to paint. I masked right around the top of the box and also the unsanded side (inside). Spray paint the inside of the box. Wear old clothes for this and a dust mask to keep the paint out of your nose. Reapply as many costs as you like to make the box as opaque as possible. I used a full can of gloss white spray paint.
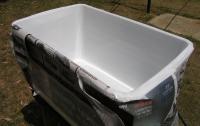
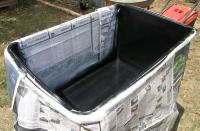
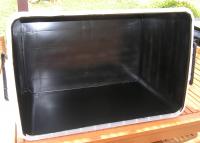
Allow the white paint to dry for between 5 minutes and an hour (or as directed for recoating) and then paint over the white paint with the flat black paint. Again I used a full can of flat black spray paint. The black on the inside helps to absorb the light on the inside of the box. Figure 3 shows the box after painting with the flat black paint. Notice the masked off side and also the show through from the white paint. If you can afford a second can of flat black paint, it will make a more professional finish! Once the paint is dry, unmask the box. Figure 4 shows the box unmasked. Notice the outside looks white and the inside is black (except for the bottom which is unpainted).
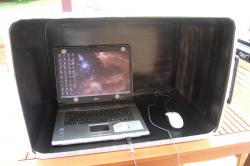
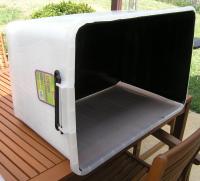
Next I added a strip of adhesive Velcro hook material around the top and both sides of the “hutch” – see Figure 5. This will allow me to attach a fabric hood to the hutch to make it darker inside and achieve better contrast to view the laptop screen during the day. A black fabric hood is best for this application, but a black hood will get hot in the sun, so I am planning to get a double sided hood sewn up – white on top and black underneath. Another option that may be worth experimenting with here is to use a space blanket shiny side out. Most space blankets are very light though and might blow away or lift in a breeze, but there are some more robust versions around that might be worth a try. The final step to finishing the hutch itself is to cover the bottom surface. I chose black “Cover-It” adhesive vinyl, so it will absorb light and provide a robust surface for the laptop and mouse to sit and work on. Use the Stanley knife to trim the vinyl to size after application. Figure 6 shows the finished hutch with the vinyl installed. Figure 7 shows the laptop in pride of place with lots of ventilation and room for the mouse to run around. Even without the hood it makes some difference to the visibility of the screen. Not counting the Velcro (which was surplus to previous projects) the hutch cost less than $35 to make, and it can be done in an afternoon.
Article by Alan Sheehan B.E (sheeny). Discuss this article on the IceInSpace Forum.  |
|
|||||||||||||||||||||||||||||||||||||||||||||||